Appearance
Lightspeed
This page describes the installation procedure for owners of a Lightspeed store. The designer is currently only available for Lightspeed stores created in Belgium, The Netherlands or Germany.
Install the app
To use the Printlane Designer, you need to install the Printlane for Lightspeed application from the Lightspeed App Store. Please head over to the Lightspeed Apps Store and install the app for your online store.
Activate your account
After installing the app, you will receive an e-mail to activate your account. Please follow the link in this e-mail and enter a password you would like to use to log in.
Did not receive an account activation e-mail? Please contact Printlane using the Printlane website.
Enabling designer for products
For the designer to know if a product is personizable, every customizable product needs to have a custom field attached. This field is used to:
- Know if a product is personizable
- Remember the design created by the customer
- Allow the customer to change the design from withing the shopping cart
- Retrieve the customer's design after placing an order
Instead of creating this field over and over for each customizable product, you can create a custom field group you can reuse every time.
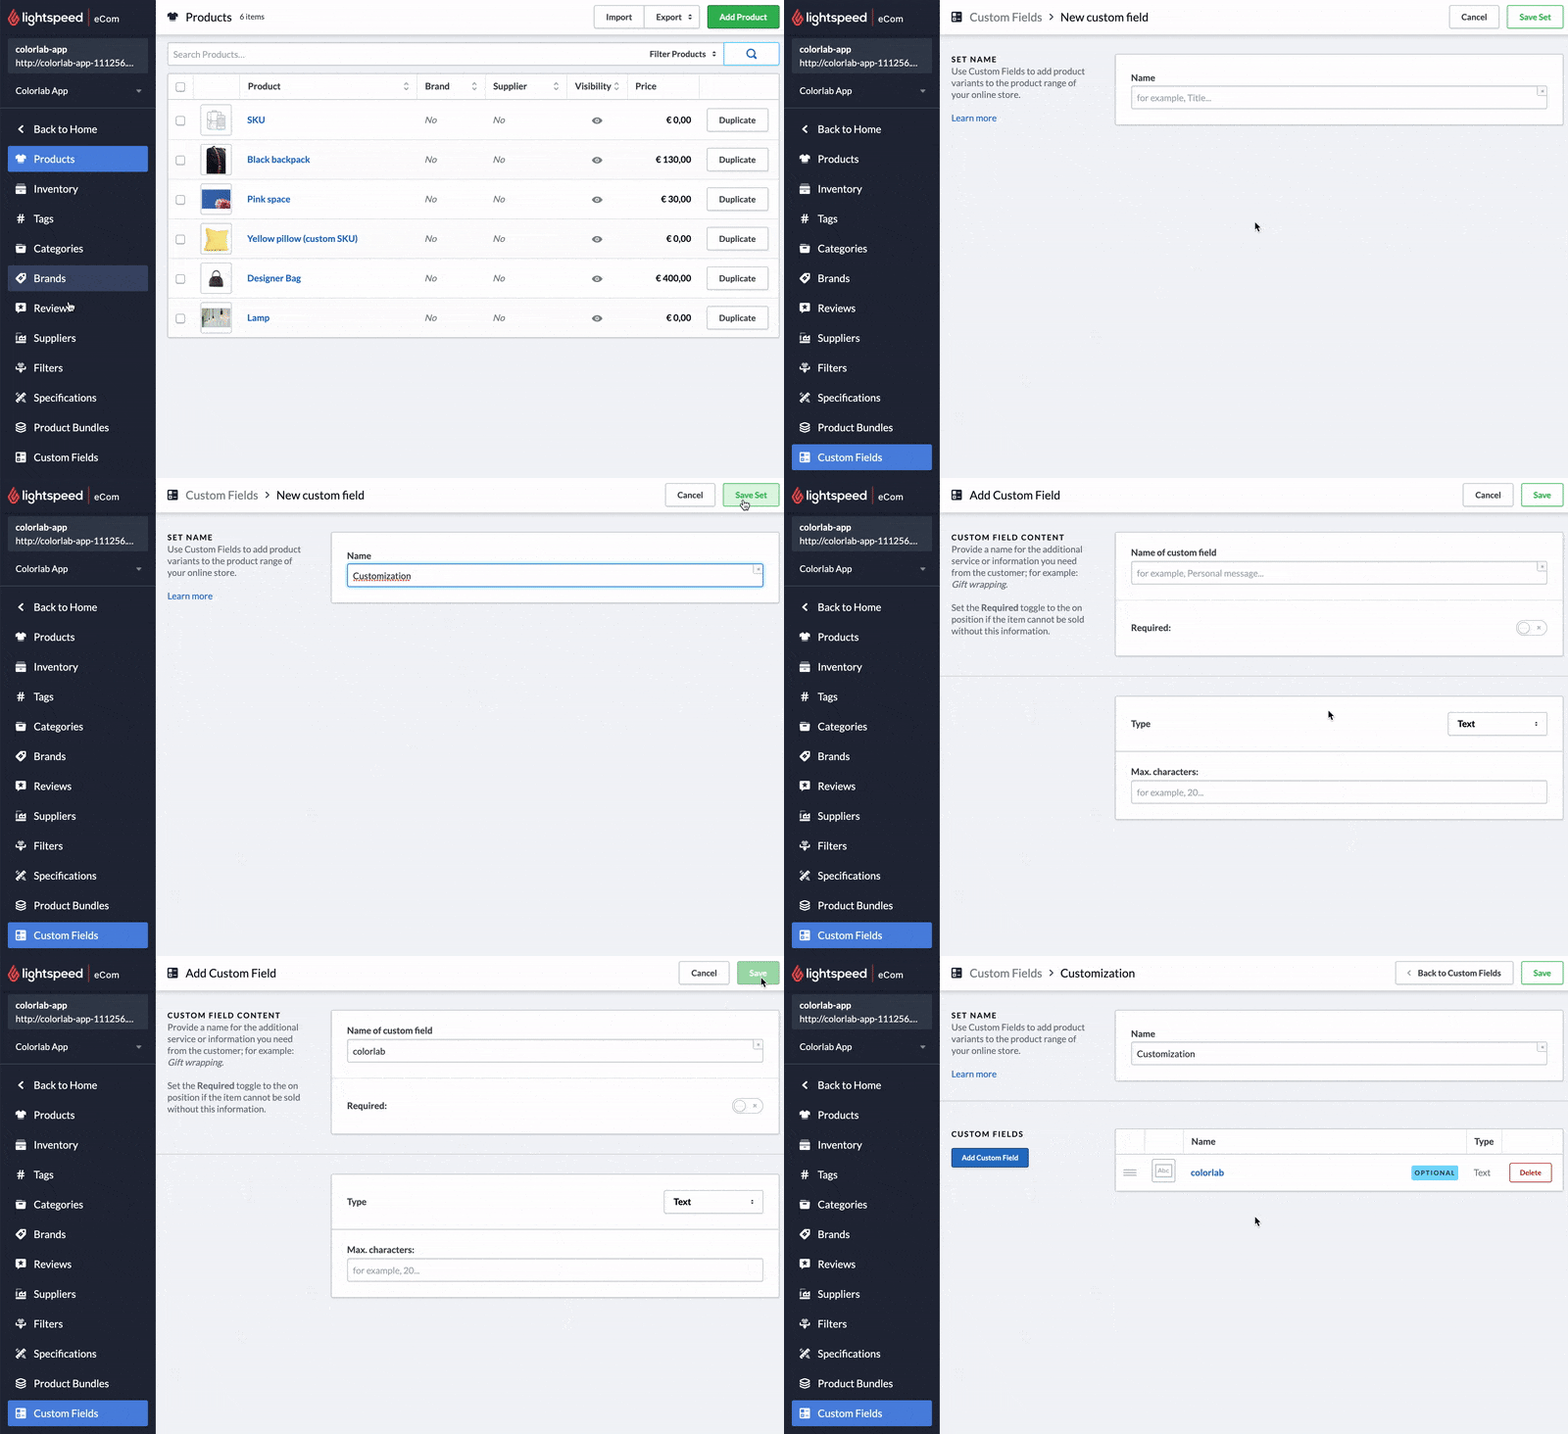
1. Create a custom field group (once)

- Open the Lightspeed back-end log in. You can reach the back-end by navigating to www.yourdomain.com/admin.
- Click on products in the navigation
- Next, click on extra fields
- Give the custom field group the name Design and click on the save button
- Click on Add field to add a new text field to the group
- Give the field the name printlane (all lowercase), make it non-required and do not limit the amount of characters
- Click on the save button
You are now ready adding the custom field group. You’re now able to add this field set to products that need to be personalized using the Printlane Designer.
2. Enable the designer for a product
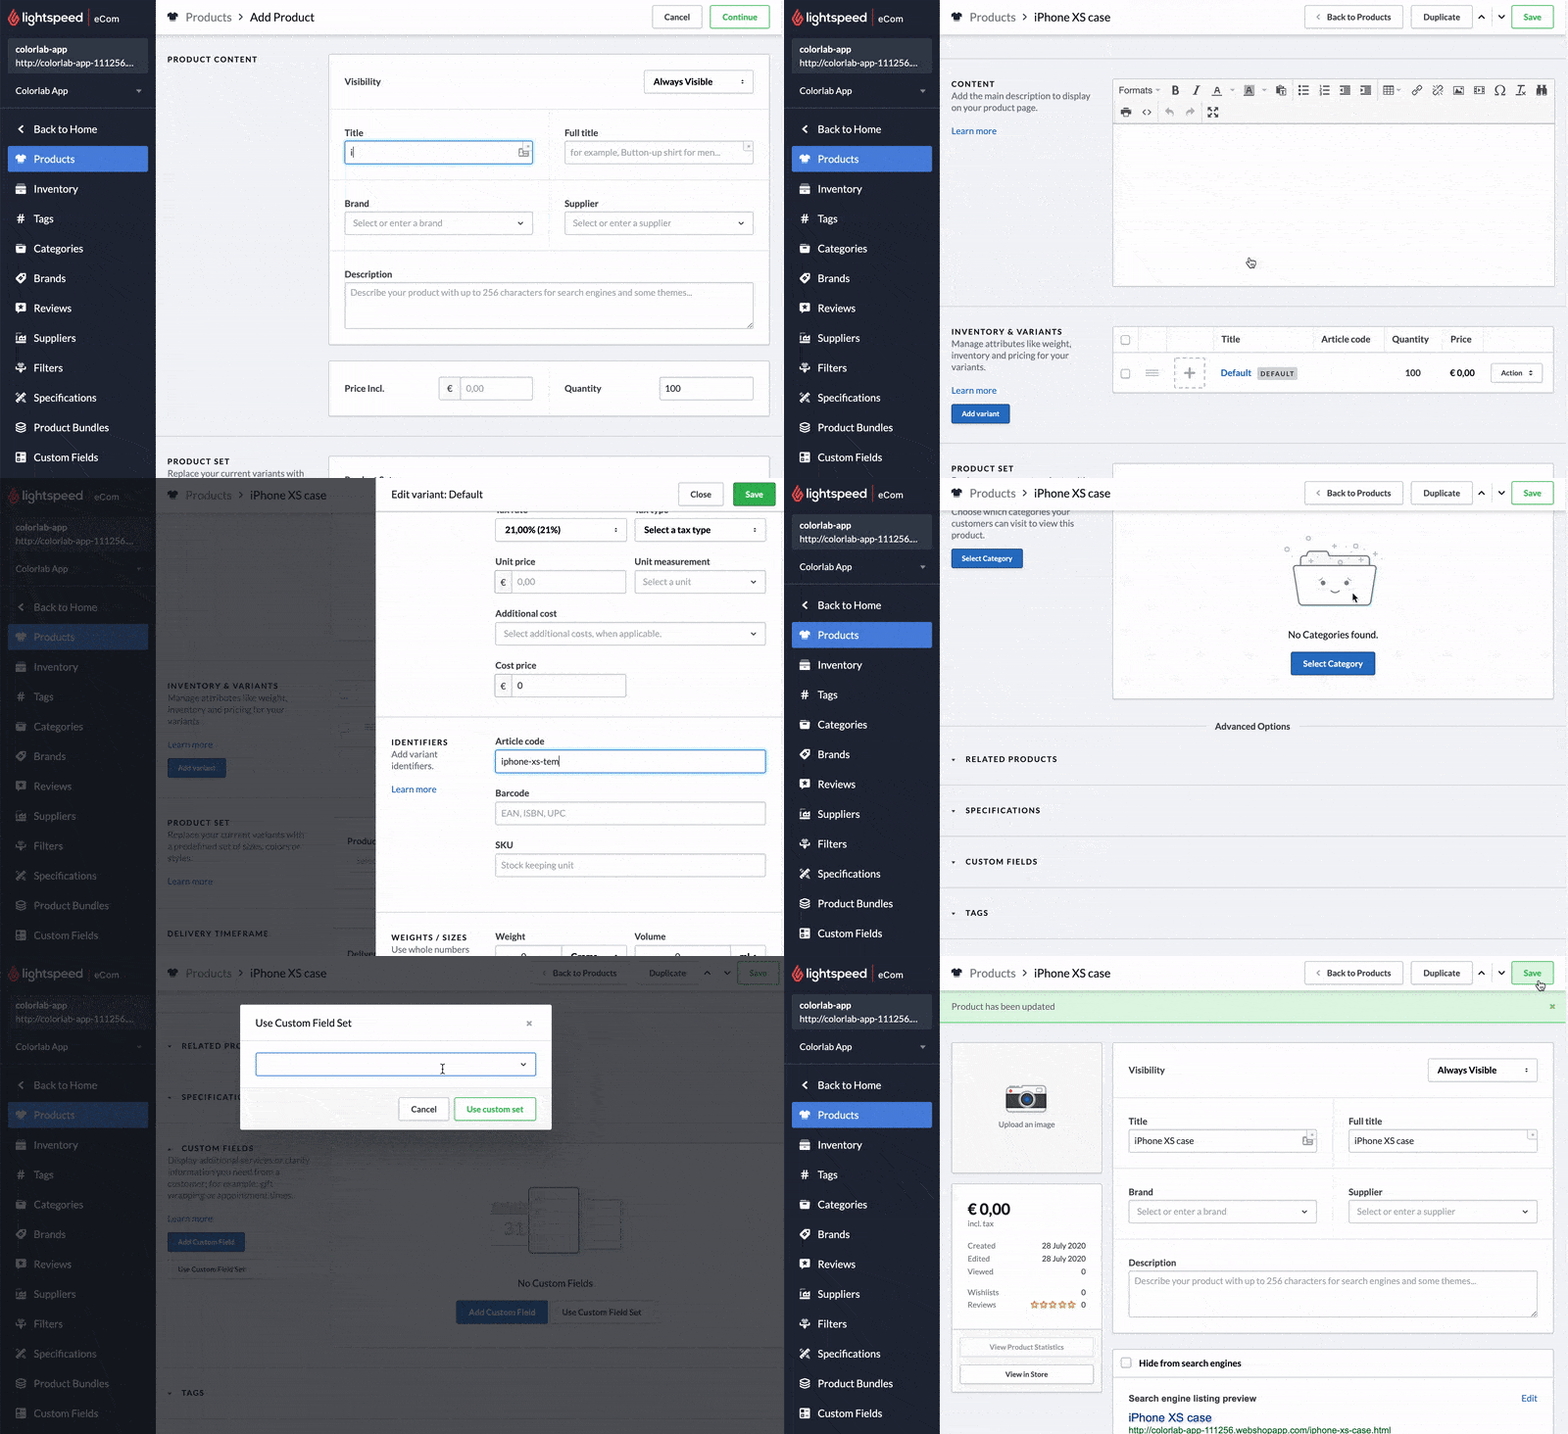
For every customizable product, you need to use the created custom field group to enable to Printlane Designer for that product:

- Open the Lightspeed back-end log in. You can reach the back-end by navigating to www.yourdomain.com/admin.
- Edit a product and scroll down to Stock and variants
- Make sure that every variant has an article number. This number is a unique reference to a template in Printlane Studio.
- Add or edit a variant and enter an article number.
- Scroll down to the heading Extra fields
- Click on the button Use field group, and select the field group Design that you created before.
- Save the product
The product is now ready to be customized by your customers. Repeat these steps for every product is customizable.
TIP
Make sure you use article numbers that have a referencing template in Printlane Studio. If you enable the designer for a product that has no template in Printlane Studio, the designer will still open and show a Product not found error when opened.
Opening the app on the product page
Default implementation
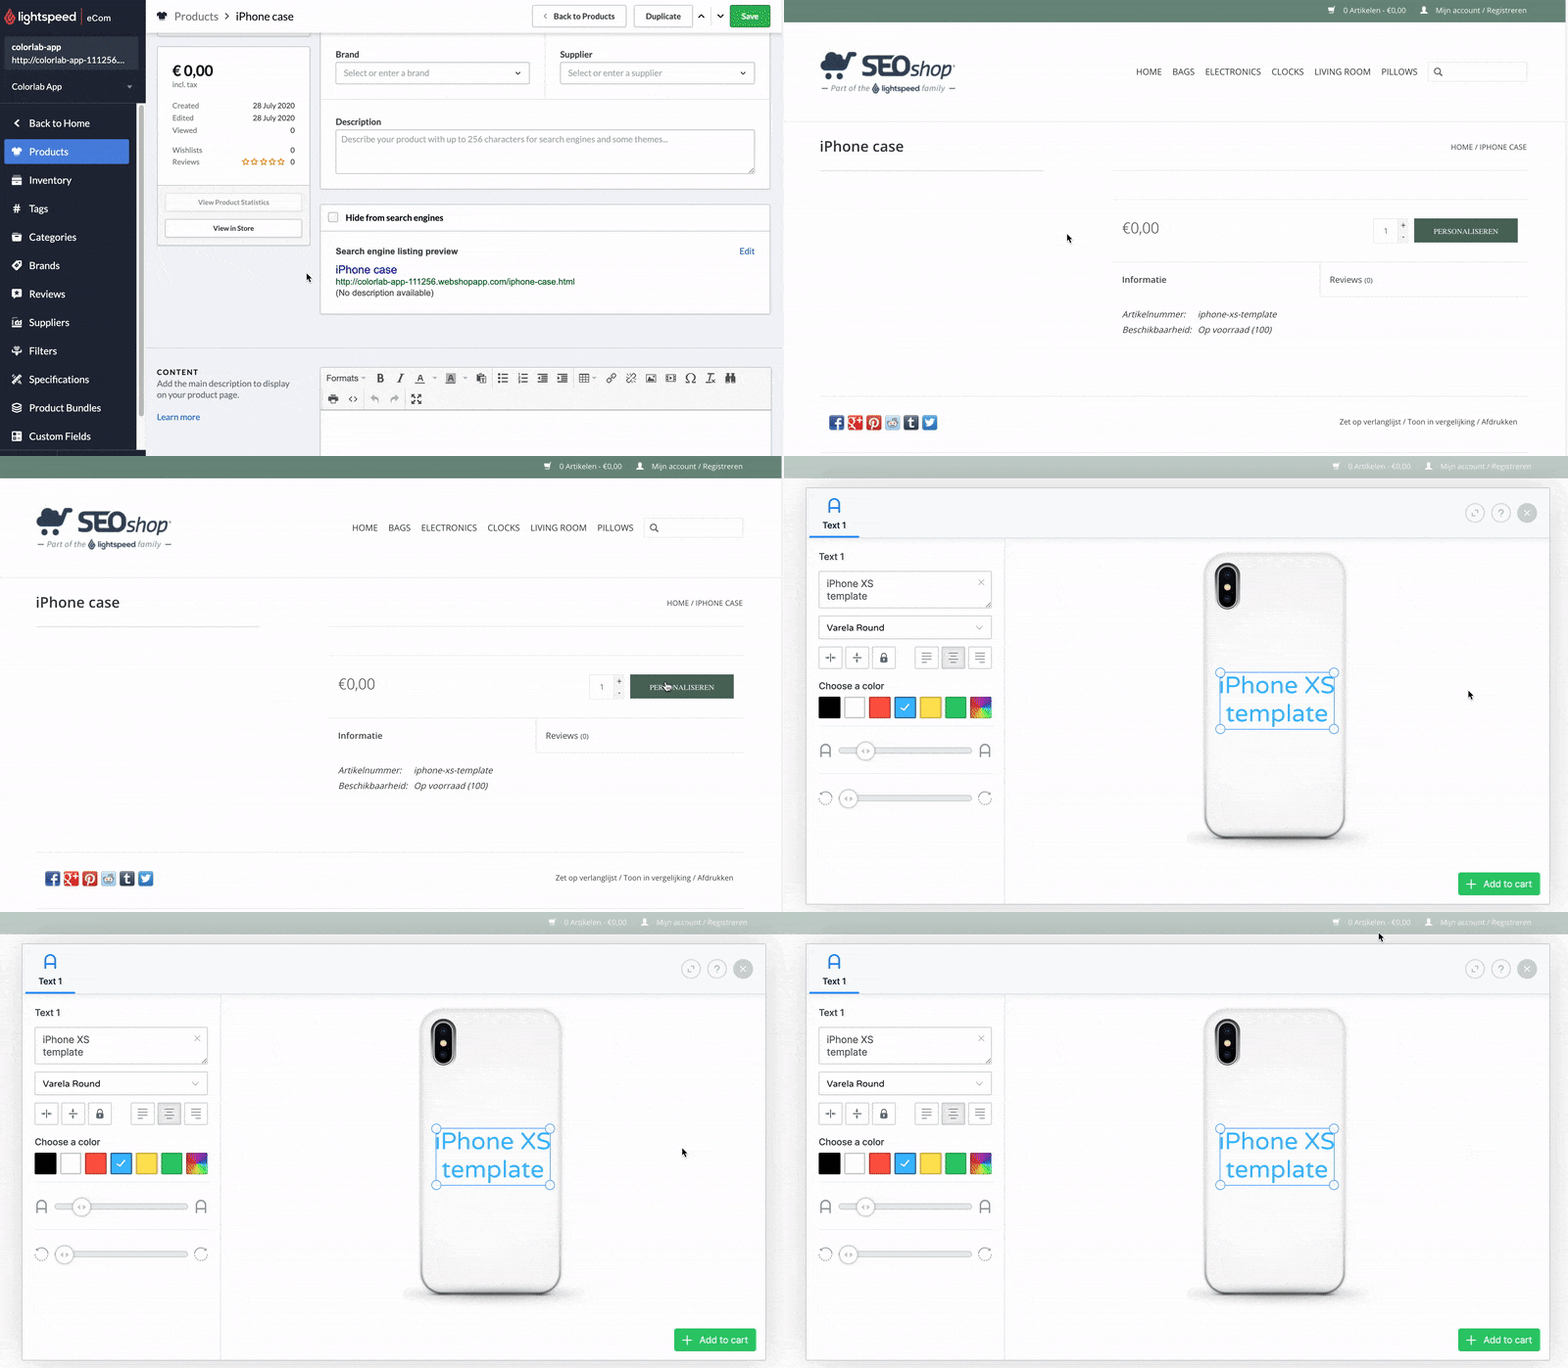
After installing the app and adding the custom field to a product, head over to the product detail page in your store. The Add to cart button should now display Customize as text. Click on the button to open the Printlane Designer:

TIP
Did your Add to cart button not change to a Customize button? Please contact Printlane using the Printlane website.
Using multiple variants
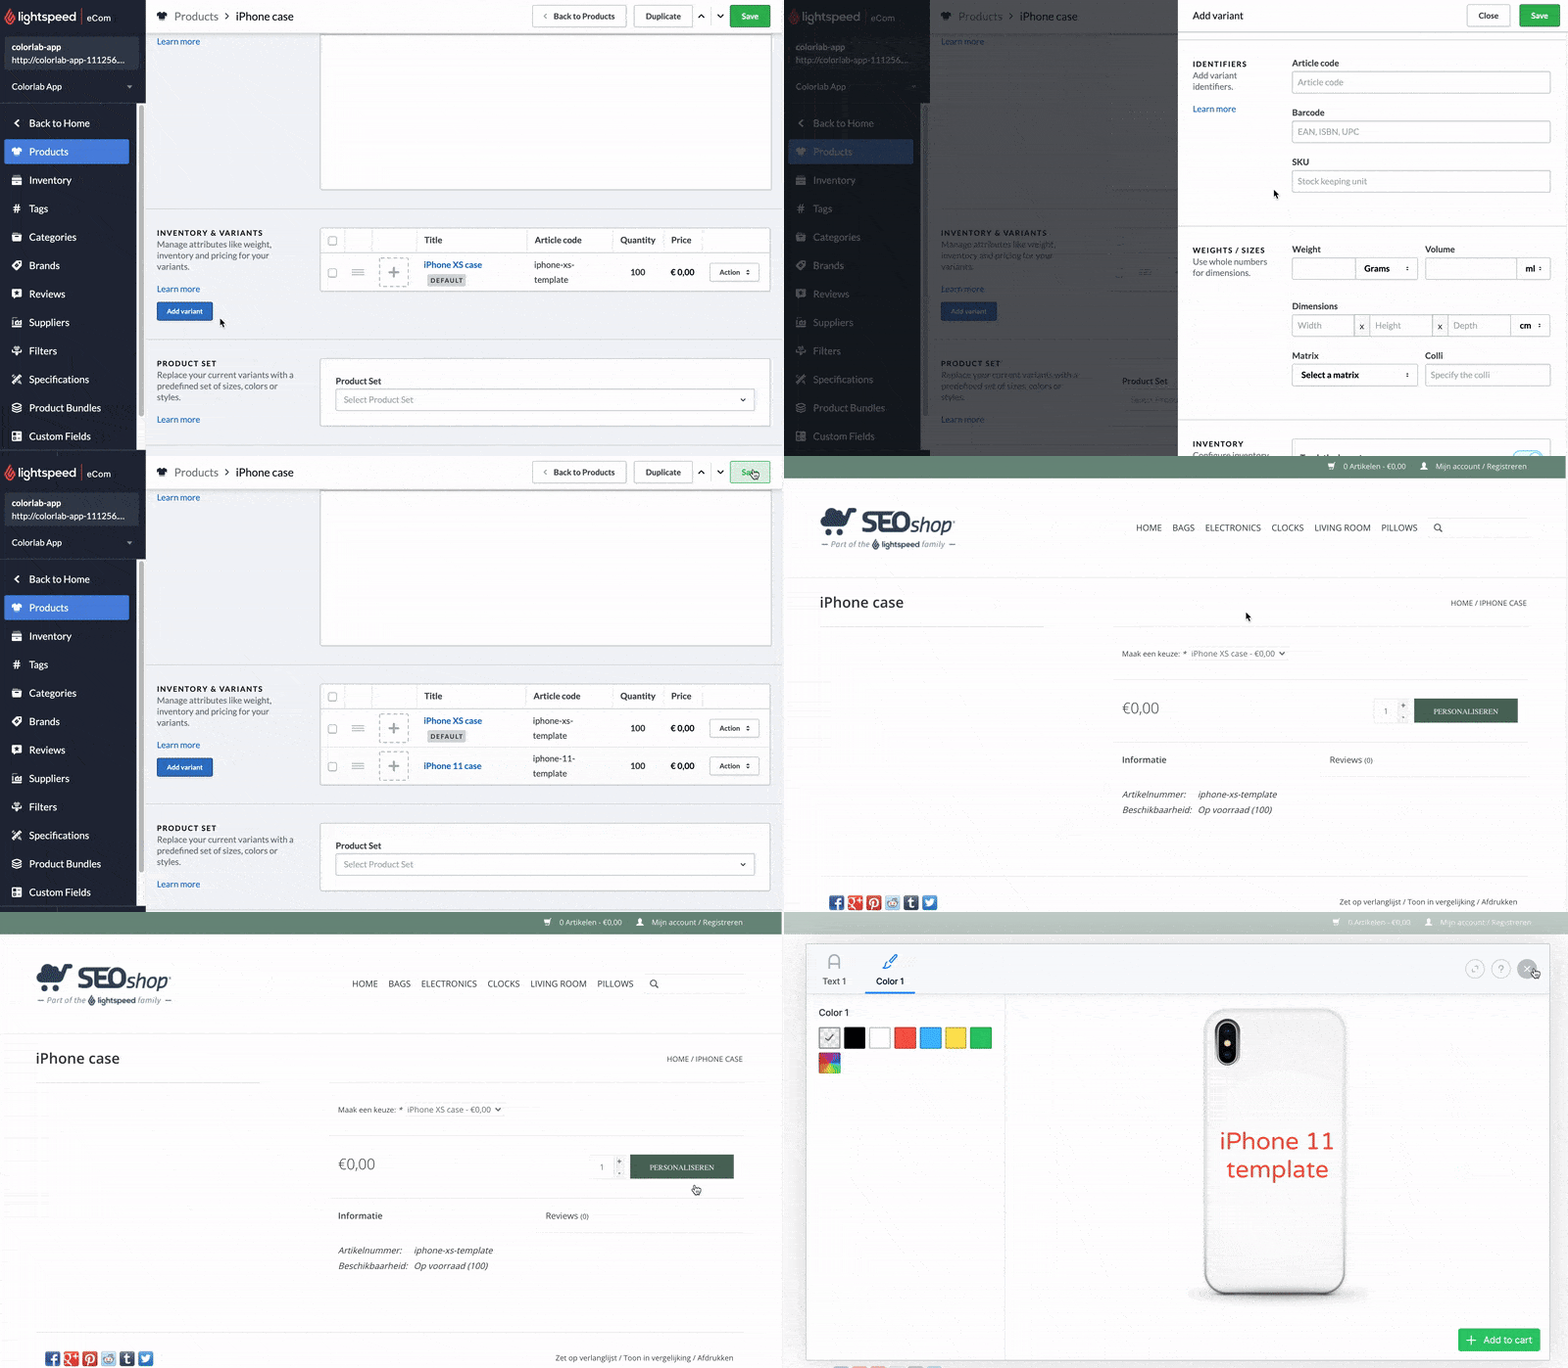
The default implementation supports using multiple variants. Add each variant and enter it's corresponding Printlane template ID.

Note: All variants need to be customizable. If you want to exclude some variants, please contact Printlane Support.
Using custom fields to determine which Printlane template to use
If you wish to change the template based on a a choice made in a custom field, you can't use the default implementation because Lightspeed unfortunately only allows to store a template ID for variants, and not for custom fields.
In this case, we advise you to integrate Printlane using the Javascript implementation in your theme. Example:
js
var templateId = 'iphone-template';

// The add to cart button on the page
var addToCartButton = document.querySelector('.add-to-cart');

// A select to choose a value from the Lightspeed custom field
var chooseColorSelect = document.querySelector('select.choose-color');

// Callback to open designer
function openDesigner() {
  printlane.open({
     shop: 'your-store-id',
     product: templateId,
     callback: function() {
       // Remember the Printlane reference
       document.getElementById('printlane-reference').value = id + '.' + token;

       // Close the designer
       printlane.close();

       // Submit the product to the shopping cart
       document.getElementById('form-add-to-cart').submit();
     }
  });
}

// Helper functions to enable or disable the designer
function enableDesigner() {
  addToCartButton.innerHTML = 'Customize product';
  addToCartButton.addEventListener('click', openDesigner);

}
function disableDesigner() {
  addToCartButton.innerHTML = 'Add to cart';
  addToCartButton.removeEventListener('click', openDesigner);
}

// Listen to changes in the select
chooseColorSelect.addEventListener('change', function(e) {
  // Disable designer
  disableDesigner();

  // Get the selected color
  var selectedColor = e.target.value;

  // Non customizable colors
  if (selectedColor === 'white') {
    return; // Exit early
  }

  // Update the template ID to match the color
  templateId = 'iphone-template-' + selectedColor;

  // Enable designer
  enableDesigner();
});As the integration greatly depends on your theme and how custom fields are rendered, Printlane does not offer development services to adapt the example above to your theme. However, we're happy to validate if your integration is set up correctly once it's implemented in your theme.
Please contact Printlane Support if you wish to integrate Printlane using the Javascript integration for more flexibility.
If you need help from an expert to setup the Javascript implementation in your theme, you can find Lightspeed experts here.
Creating and changing designs
Customize and add to cart
If the designer opens on your product page, customize the product to your liking and click on the Add to cart button in Printlane.
The designer will close automatically and you will be redirected to the shopping cart.
Change design
Your shopping cart now displays the customized product along with a change design link.
To change the design, click the link and make the desired changes. When finished, click the save button in the Printlane Designer. The design is now updated.
Orders with designs
1. Retrieve the Design ID
Every customized order line has a unique Printlane reference. Example: 42450.15bd7c88-77b3-4a87-9a46-ad1b8a443452
Follow these steps to find the Printlane reference:
- Open the order with customized products in the Lightspeed back-end
- Find the order details
- Line items with a design will show following code:
printlane: 42450.15bd7c88-77b3-4a87-9a46-ad1b8a443452 - Copy the part before the dot:
42450
2. Lookup the design
Look this number up in Printlane Studio to get the right design.
- Log into your account in the Printlane Studio
- Click on
Designson the Dashboard - Paste the ID in the
Search by IDfilter on top of the page and hit enter - The corresponding design is shown.