Appearance
Shopify
This page describes how you can install and use Printlane in your Shopify store.
Install Printlane
- Install Printlane from the Shopify App Store
- Activate your account by clicking on the link in the account activation email
TIP
Did not receive an account activation e-mail? Please check your spam folder, or contact us using the contact form our website.
- Enable Printlane in your Shopify Theme by following the link in the email or the instructions below:
Enable Printlane in your theme
Before you can use Printlane, you need to enable it in your current Shopify theme:
- Open your Shopify Admin
- In the navigation, click on
Online Store->Themes:
- Click on
Customizenext toCurrent theme:
- In the navigation, click on
App embedsandenable Printlane: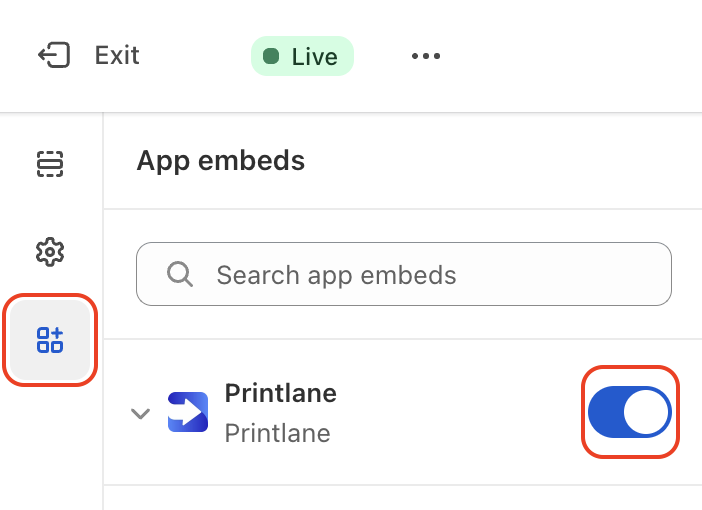
- Save your theme:

If you switch to another theme in the future, you need to follow the above steps again.
Customize products
Now Printlane is enabled, you can activate the designer for one of your products. We'll use one of the demo templates in your Printlane account.
- Open Printlane Studio
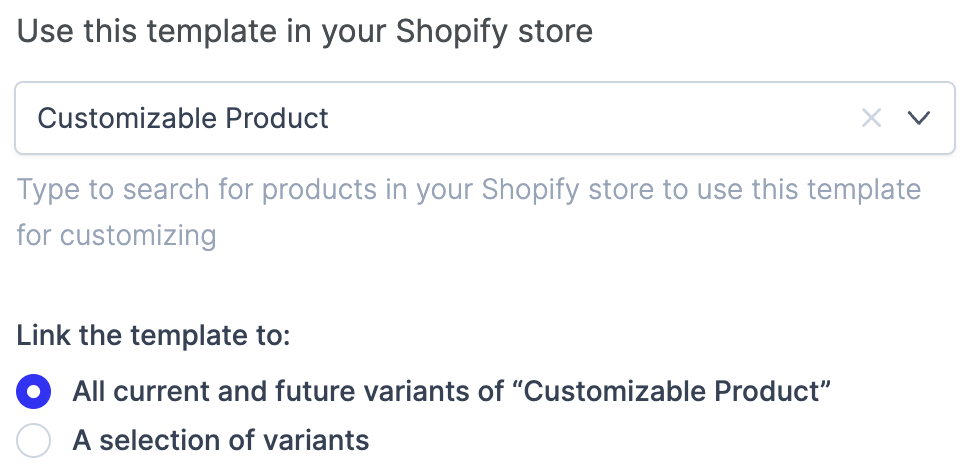
- Edit a demo template and click on the
Shopifytab - Select one of the products from your Shopify store
- Click on
Save
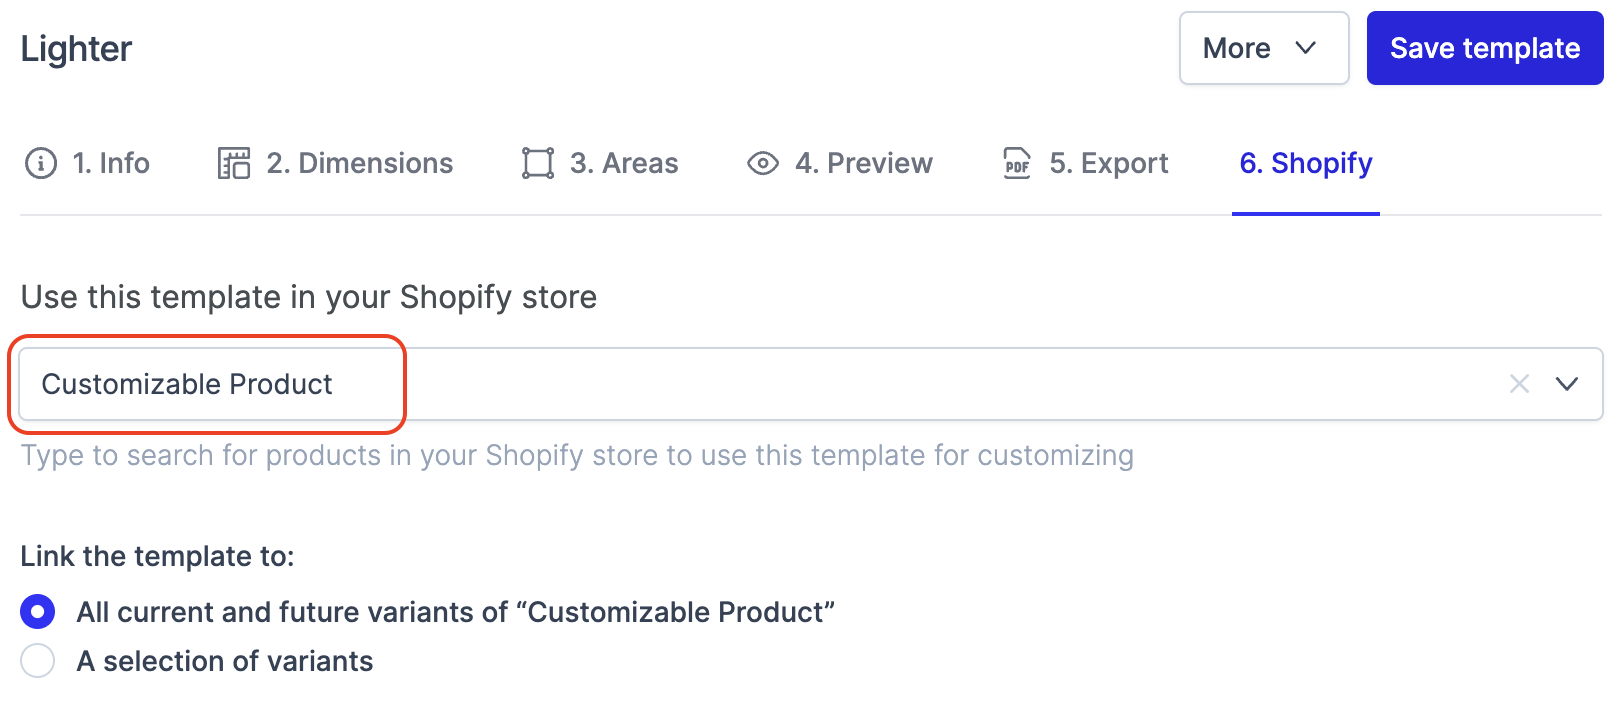
The Shopify product you selected will use this template in the designer.
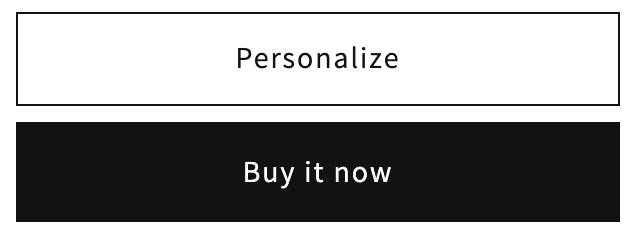
Open the product page in your Shopify store. It will display a button Personalize instead of Add to cart. You can customize the product by clicking on the Personalize button.
Read our full guide on Creating templates if you like to create and link your own templates.
Designs in the shopping cart
A unique reference to the design is displayed after adding a product to the shopping cart:
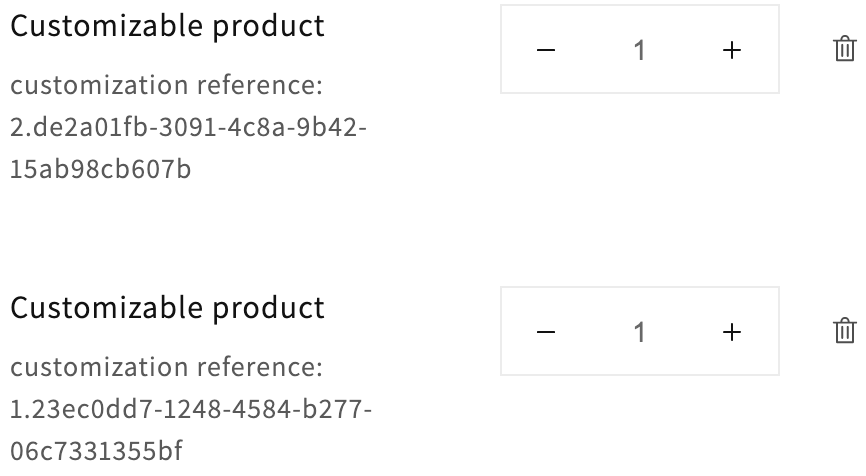
This reference is stored in a line item property, allowing customers to add the same product multiple times to the shopping cart with a different design.
Changing designs from within the shopping cart
You can replace design references with links that allow your customers to review and change designs from withing the shopping cart.
To do so, you'll need to update your theme's cart liquid code:
- Open your Shopify Admin
- In the navigation, click on
Online Store->Themes: - Click on the
Actionsdropdown for your Current theme, and chooseEdit code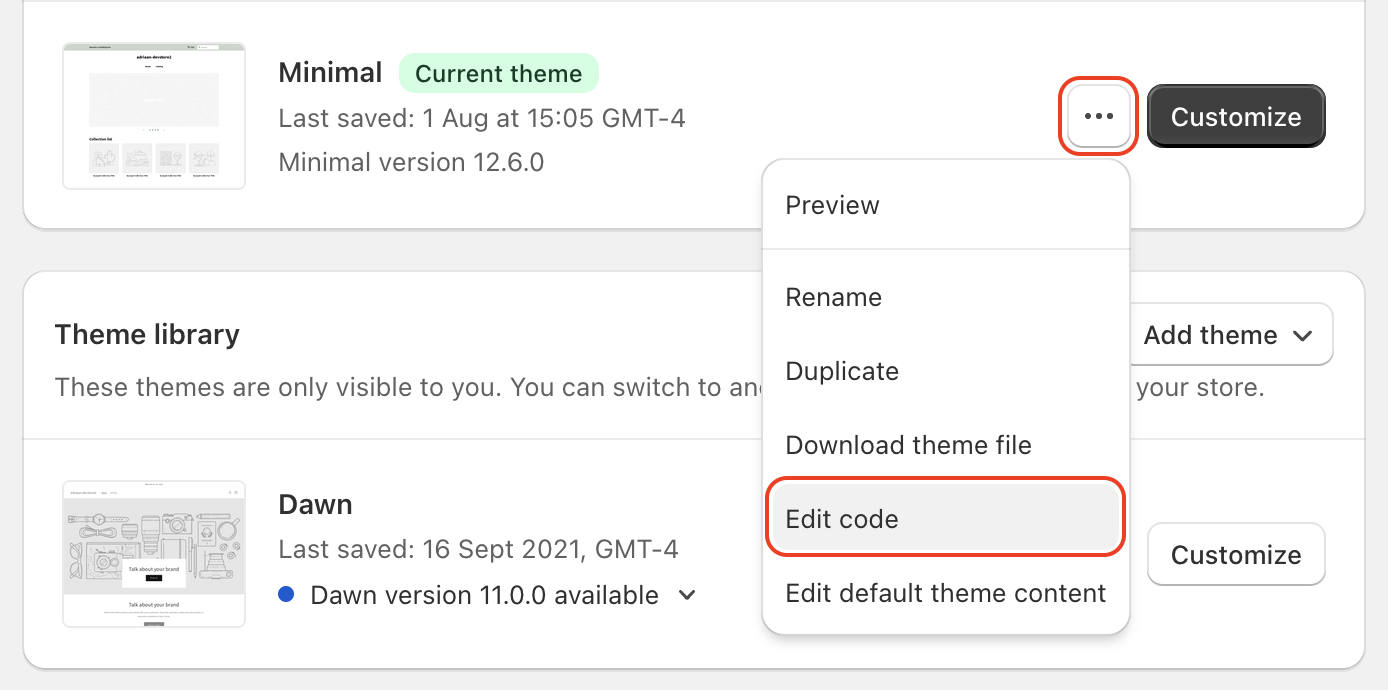
- Open the cart liquid file. It's usually named
main-cart-items.liquid,cart.liquid,cart-template.liquidorform-cart.liquid. This file should contain code that loops over each line item's properties:liquid{% for property in item.properties %} ... code that prints properties here {% endfor %} - Add a conditional statement looking for
customization reference, and print a link:liquidFor a complete overview of all tags, please refer to Shopify's Liquid documentation.{% for property in item.properties %} {% if property.first contains 'customization reference' %} <a href="#" class="printlane-open" data-printlane="{{ property.last }}">Change design</a> {% else %} {{ property.first }}: {{ property.last }} {% endif %} {% endfor %} - The design references are now shown as links and will open the Printlane Designer when clicking on them:

TIP
Please take into account that design references will always be displayed in the Shopify Admin, on checkout pages and confirmation emails.
Displaying thumbnails of designs
First allow changing designs
To display thumbnails of the created designs on the shopping cart page, you first need to make sure that users can review and change designs on the shopping cart page (see above).
Printlane offers functionality that generates a thumbnail of the design that you can use to display in the shopping cart. You can think of this as a screenshot of what was last displayed in the designer application right before the customer added the product to the shopping cart.
You can enable this if you're displaying links to change designs (see previous step) and by following these steps:
- Open your Shopify Admin
- Click on
Online Storein the navigation - Next to
Current themeclick onCustomize - Click on
Theme settings->App embeds - Expand Printlane and tick the checkbox
Replace cart thumbnails
- Save your theme
After enabling this functionality, follow these steps to ensure it works:
- Navigate to a customizable product page
- Create a design and and add it to your shopping cart
- The shopping cart should now replace the original image in with a thumbnail of the design
If you're experiencing difficulties having the thumnails to appear, please check:
- if the
Cart row selectoris correct. It should be a CSS selector string that matches all cart line items. - if the items in your shopping cart were added before ticking the checkbox
Replace cart thumbnails. These items won't have a thumnail available yet.
Uninstalling or cancelling Printlane
If you want to stop using Printlane or cancel your subscription, you can simply do so by uninstalling the app from your Shopify store:
- Open your Shopify Admin
- Click on the
Appslink in the left sidebar - Under
installed apps, you'll see Printlane, click on the "waste bin" icon - Confirm uninstalling Printlane
All access to your Shopify store and data is now revoked. Your data in Printlane will be automatically erased according to our data processing policy.
You might have done changes to your theme's liquid code to allow customers to change designs from their shopping cart (see 4. Designs in the shopping cart).
To revert these changes, please follow these steps
- Open your Shopify Admin
- In the navigation, click on
Online Store - Click on the
Actionsdropdown for your Current theme, and chooseEdit code - Find the cart's liquid file (usually named
cart.liquid,form-cart.liquidorcart-template.liquid) - Open the file and remove the code that was added earlier
- Save you Shopify theme
Troubleshooting
I need help with integrating Printlane in my Shopify store
If you aren't able to get Printlane working by following all steps described in this document, please contact our support department by following the Support-link in Printlane Studio.
Take into account some time for our support to respond to your request for assistance.
I've switched to another theme and Printlane is not working anymore
When you publish or prepare another theme, you need to enable Printlane in that theme as well. Please go to 2. Enable Printlane in your theme and apply all steps to the new theme.
Customers can add products to my cart without customizing
Some Shopify themes come with "Quick add" functionality or show Add to cart buttons on catalog or collection pages. Shopify does not support creating designs from overview pages.
To prevent customers adding products without designs, please take a look at your theme's settings and disable Quick Add functionality or hide Add to cart buttons from overview pages to prevent this from happening.
When clicking the personalize button, the Printlane Designer doesn't open
When the text on the Add to cart button is changed to Personalize, Printlane is enabled and the designer for the product is active.
However, some Shopify themes implement functionality that override the default way of adding products to the shopping cart, which can break the Printlane integration.
If you happen to see the Personalize-button, but the Printlane Designer does not open when clicking the button, please take a look at your theme settings and disable any functionality like "Add to cart using Ajax" and / or setting the Cart type to Page: 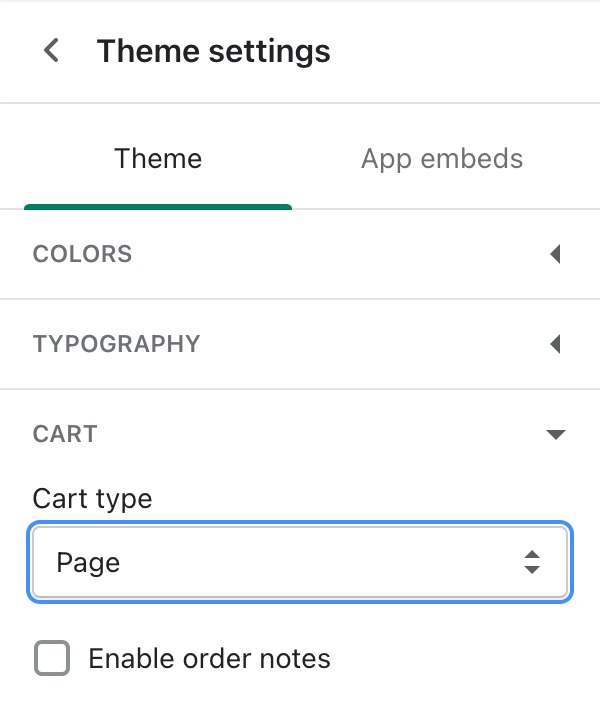
How do I hide the Buy it now button on product pages?
Some themes display Buy it now buttons next to the regular add to cart buttons. These are called dynamic checkout buttons and can't be configured to work with Printlane.
To prevent customers from buying products without a design, you need to disable these buttons.
- Open your Shopify Admin
- Click on
Online Storein the navigation - Next to
Current themeclick onCustomize - Navigate to a product page
- Click on the
Buy buttonsitem in the navigation and uncheckShow dynamic checkout buttons
- Save your theme
When linking or updating a Printlane template to a Shopify product, the changes are not immediately visible
When you initially link a template to a Shopify product, it might take up to a minute for the Personalize button to show on the product page.
This is because Shopify might cache your product page, and the changes haven't come through just yet.
This also happens when updating the product or the variants for which the template is used. Please allow some time for Shopify to display the changes.
How can I hide the design reference on checkout pages?
Shopify does not allow to change checkout pages unless you have a Shopify Plus subscription. If you have such a subscription, you can override the checkout pages.
If you make changes to your checkout code, then you need to upgrade your checkout.liquid template manually whenever Shopify makes an upgrade. We advise to use the default checkout provided which displays the design reference.
I've received an order, how do I see it's design?
Every customized order line has a unique Printlane reference, for example 1.03dc0b02-8431-4ac8-9bfa-f32d279554d5: 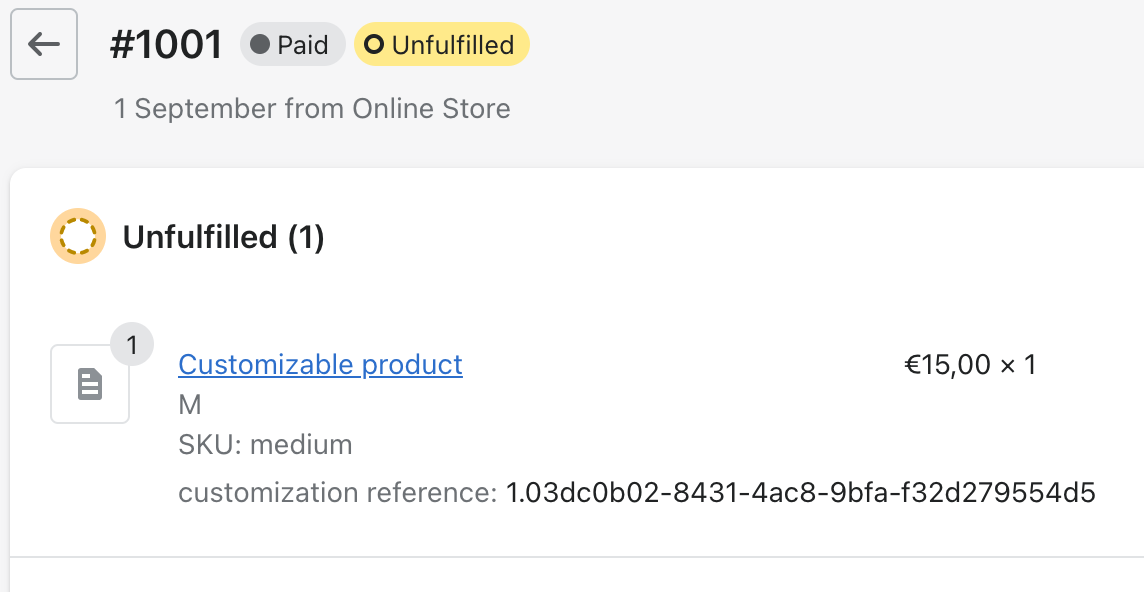
The first part before the dot is a number, 1. This is the ID of the design, a number that increases automatically when creating more designs. You can lookup the ID in the list of designs in Printlane Studio.
Paste the ID 1 in the Search by ID filter on top of the page and click on the search-button to find the corresponding design: 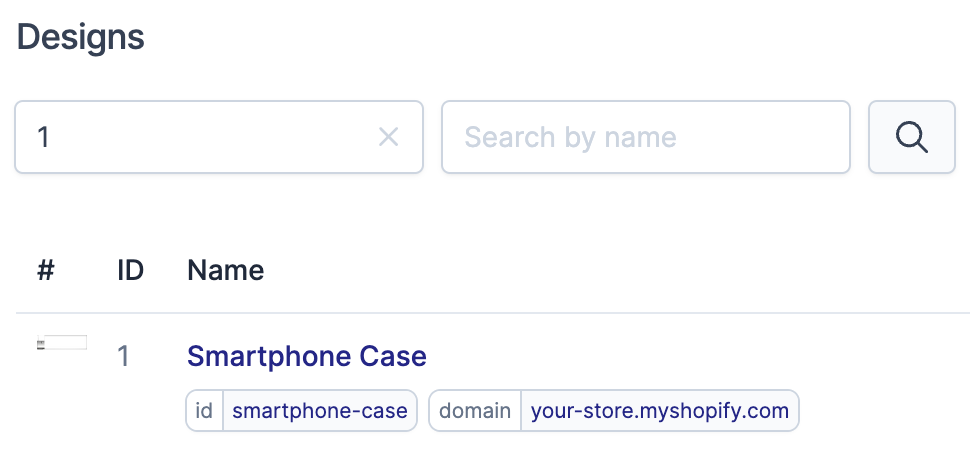
Did you know you can also lookup orders in Printlane Studio? This page shows all orders that contain at least one order line with a design reference. Orders and order lines without referenced designs are not available in Printlane due to data processing regulations.
I want to remove Printlane code or snippets from my theme
Please follow the uninstall instructions in Uninstalling or canceling Printlane.